Mastering Secure Remote Access For Raspberry Pi In IoT Projects
Unlocking the potential of your Raspberry Pi through secure remote access is a game-changer for managing IoT projects. Whether you're a professional developer or an enthusiastic hobbyist, the ability to control your Raspberry Pi from anywhere in the world opens up endless possibilities for automation, monitoring, and data collection. However, ensuring secure access is just as important as functionality to safeguard your device and data from unauthorized access.
In today’s interconnected world, remote IoT projects demand seamless integration of hardware and software. The Raspberry Pi stands out as an ideal platform due to its affordability, versatility, and user-friendly nature. Yet, achieving secure remote access requires careful setup and configuration. This guide will walk you through the process of setting up secure remote access for your Raspberry Pi, equipping you with the tools and best practices needed to interact with your device safely from anywhere in the world.
Table of Contents
- Understanding Raspberry Pi Remote Access
- The Importance of Security in Remote IoT Projects
- Exploring Methods to Access Raspberry Pi Remotely
- Leveraging SSH for Secure Command-Line Access
- Configuring VNC for Remote Desktop Access
- Utilizing Ngrok for Simplified Tunneling
- Optimizing Network Configuration for IoT
- Enhancing Security with Firewall Configuration
- Automating Tasks in Remote IoT Projects
- Best Practices for Secure Remote Access
Understanding Raspberry Pi Remote Access
Raspberry Pi has revolutionized the tech landscape, offering powerful capabilities in a compact package. Its potential truly shines when you can access it remotely, enabling you to manage IoT projects from anywhere. Remote IoT applications often require access to the Raspberry Pi from distant locations, making secure remote access a critical component of modern IoT solutions.
Read also:Exploring Elon Musks Partners And Kids A Comprehensive Look
Whether you're monitoring environmental sensors, controlling smart home devices, or managing industrial automation systems, remote access simplifies the process. This section delves into the fundamentals of remote access, emphasizing its significance in today's IoT-driven world. By grasping these foundational concepts, you'll be better prepared to configure your Raspberry Pi for secure and reliable remote interactions.
The Importance of Security in Remote IoT Projects
Security is paramount when setting up remote access for your Raspberry Pi. In the realm of IoT, devices are frequently exposed to the internet, making them vulnerable to cyber threats. A compromised Raspberry Pi could lead to unauthorized access, data breaches, or system failures, jeopardizing your entire IoT setup.
Common Security Threats
- Brute-force attacks targeting default credentials
- Malware infections through unsecured connections
- Data interception during transmission
To safeguard your Raspberry Pi against these risks, it's essential to implement robust security measures. This includes using strong, unique passwords, enabling encryption, and keeping your system updated with the latest security patches. By prioritizing security, you can protect your device and data while ensuring seamless remote access.
Exploring Methods to Access Raspberry Pi Remotely
There are several methods available for remotely accessing your Raspberry Pi, each offering unique advantages and limitations. The choice of method depends on your specific requirements and the level of security you need. This section will examine popular options, providing detailed guidance on setup and configuration.
Popular Methods
- SSH (Secure Shell): Ideal for secure command-line access
- VNC (Virtual Network Computing): Perfect for graphical interface access
- Ngrok: Simplifies secure tunneling through firewalls
Each method caters to different needs, from command-line operations to full desktop control. Understanding their capabilities will help you select the most suitable option for your IoT projects.
Leveraging SSH for Secure Command-Line Access
SSH (Secure Shell) is one of the most widely used methods for accessing Raspberry Pi remotely. It establishes encrypted communication between your local machine and the Raspberry Pi, ensuring secure data transmission. SSH is particularly useful for executing commands, managing files, and performing administrative tasks.
Read also:Is Megan Moroney A Liberal Exploring Her Political Identity
Setting Up SSH
- Enable SSH on your Raspberry Pi through the Raspberry Pi Configuration tool
- Install an SSH client on your local machine (e.g., PuTTY for Windows or Terminal for macOS/Linux)
- Connect to your Raspberry Pi using its IP address and login credentials
With SSH configured, you'll have a secure and reliable connection to your Raspberry Pi, empowering you to manage your device remotely with confidence.
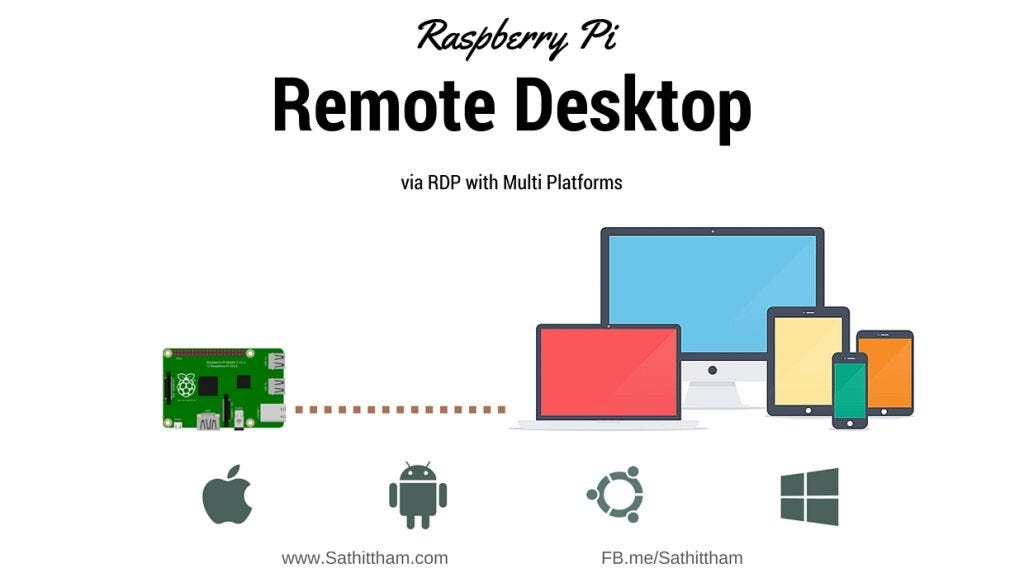
Configuring VNC for Remote Desktop Access
For projects requiring graphical interface access, VNC (Virtual Network Computing) is an excellent choice. It allows you to view and control your Raspberry Pi's desktop environment from any location, making it ideal for IoT applications that involve visual data analysis or GUI-based tools.
Configuring VNC
- Install the RealVNC server on your Raspberry Pi
- Set up a VNC client on your local machine
- Connect to your Raspberry Pi using its IP address and login credentials
VNC provides a seamless remote desktop experience, enabling you to interact with your Raspberry Pi as if you were physically present. This capability is invaluable for projects requiring visual interaction and graphical control.
Utilizing Ngrok for Simplified Tunneling
Ngrok is a powerful tool that simplifies exposing your Raspberry Pi's local server to the internet securely. It creates a secure tunnel between your local machine and the internet, enabling remote access without complex network configurations. Ngrok is especially useful for IoT projects requiring external access.
Using Ngrok
- Download and install Ngrok on your Raspberry Pi
- Run Ngrok to establish a secure tunnel for your local server
- Access your Raspberry Pi's services using the generated Ngrok URL
Ngrok streamlines the process of exposing your Raspberry Pi to the internet, making it an ideal solution for IoT projects that demand external connectivity.
Optimizing Network Configuration for IoT
Proper network configuration is essential for ensuring reliable and secure remote access to your Raspberry Pi. This involves setting up static IP addresses, configuring port forwarding, and securing your Wi-Fi network. Optimizing these settings enhances both the stability and security of your IoT setup.
Key Network Settings
- Assign a static IP address to your Raspberry Pi for consistent access
- Enable port forwarding on your router to allow incoming connections
- Use WPA2 encryption for your Wi-Fi network to enhance security
By fine-tuning your network settings, you'll ensure a stable and secure connection to your Raspberry Pi, even when accessing it from remote locations.
Enhancing Security with Firewall Configuration
A firewall acts as a protective barrier between your Raspberry Pi and the internet, filtering incoming and outgoing traffic to prevent unauthorized access. Configuring a firewall is a critical step in securing your IoT setup. This section outlines the process of setting up a firewall to protect your Raspberry Pi.
Setting Up a Firewall
- Install UFW (Uncomplicated Firewall) on your Raspberry Pi
- Allow necessary ports (e.g., SSH, VNC) while blocking all others
- Enable the firewall to start protecting your device
A well-configured firewall significantly reduces the risk of unauthorized access, ensuring the security and reliability of your IoT projects.
Automating Tasks in Remote IoT Projects
Automation is a cornerstone of efficient IoT projects, enabling you to streamline repetitive tasks and enhance productivity. By automating processes such as data collection, monitoring, and reporting, you can focus on more critical aspects of your projects. This section explores tools and techniques for automating tasks on your Raspberry Pi.
Automation Tools
- Use cron jobs to schedule regular tasks on your Raspberry Pi
- Implement scripts for automating data processing and analysis
- Leverage IoT platforms for integrating and managing multiple devices
Integrating automation into your IoT setup not only improves efficiency but also minimizes manual intervention, leading to more successful and scalable projects.
Best Practices for Secure Remote Access
Adhering to best practices is essential for maintaining the security and reliability of your IoT setup. Regular maintenance, monitoring, and updates are crucial to protecting your Raspberry Pi against potential threats. This section outlines recommended practices for ensuring secure remote access.
Recommended Practices
- Use strong, unique passwords for all accounts
- Enable two-factor authentication for added security
- Regularly update your Raspberry Pi's operating system and software
By following these best practices, you'll create a secure and robust environment for your IoT projects, ensuring long-term success and reliability.
Conclusion
Securing remote access to your Raspberry Pi is a vital skill for managing IoT projects effectively. By understanding the various methods, tools, and configurations available, you can set up a secure and reliable connection to your Raspberry Pi from anywhere in the world. We encourage you to implement the strategies outlined in this guide and explore further possibilities for your IoT projects. Share your experiences and insights in the comments section below, and consider exploring other resources on our site for deeper knowledge on related topics.


