Mastering Remote IoT Monitoring With Raspberry Pi: A Comprehensive Guide
In today's fast-paced technological era, remote IoT monitoring powered by Raspberry Pi has emerged as a transformative solution for both businesses and individuals. By harnessing the capabilities of IoT and the adaptability of Raspberry Pi, users can remotely monitor and control devices, leading to enhanced efficiency and reduced operational costs. Whether you're a tech enthusiast exploring new possibilities or a professional aiming to optimize your operations, this guide will equip you with the knowledge and tools needed to embark on your IoT journey.
Remote IoT monitoring using Raspberry Pi opens the door to countless opportunities. From automating homes to revolutionizing industrial processes, this technology facilitates real-time data collection and analysis, empowering users to make well-informed decisions. This article will delve into the fundamentals of IoT, explore the capabilities of Raspberry Pi, and demonstrate how they collaborate to create a reliable monitoring system.
As we progress through this guide, you'll uncover step-by-step instructions, best practices, and expert insights to assist you in constructing your own remote IoT monitoring system. Let's embark on this exciting journey and unlock the full potential of this powerful combination.
Read also:What Is The Gerber Life College Plan And How Can It Help You Save For Education
Exploring the Internet of Things (IoT) and Its Impact on Modern Technology
The Internet of Things (IoT) represents a vast network of physical devices embedded with sensors, software, and other technologies, enabling them to communicate and exchange data seamlessly. This groundbreaking technology has reshaped numerous industries by delivering real-time insights and fostering automation, enhancing productivity and innovation.
IoT plays a pivotal role in modern technology by fostering seamless communication between devices, boosting operational efficiency, and enriching user experiences. From smart homes and wearable devices to industrial automation and agriculture, IoT applications are redefining how we live and work. The integration of IoT into everyday life continues to expand, offering solutions that were once unimaginable.
Among the key advantages of IoT are:
- Real-time data collection and analysis for immediate insights.
- Increased automation, streamlining processes and reducing manual intervention.
- Cost savings and resource optimization, ensuring efficient use of available resources.
- Enhanced user experiences, delivering personalized and intuitive interactions.
According to a report by Statista, the global IoT market is projected to soar to $1.5 trillion by 2030, underscoring its growing importance across various sectors.
Raspberry Pi: An Essential Component for IoT Projects
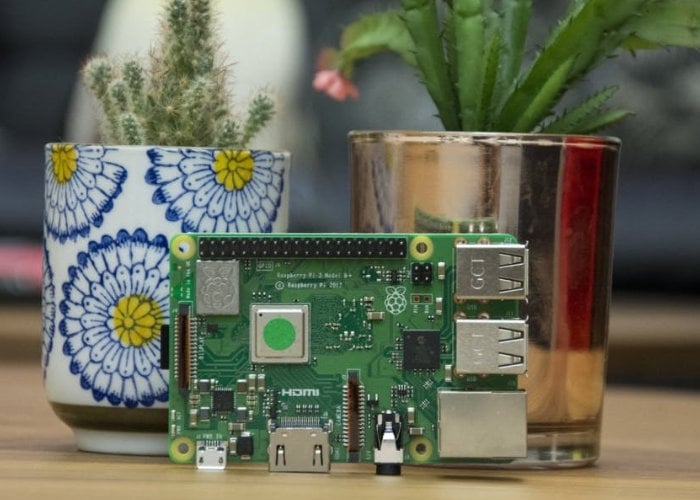
Raspberry Pi is a compact, cost-effective, and highly versatile single-board computer designed to inspire learning and innovation in the field of computing. Developed by the Raspberry Pi Foundation, this device has garnered immense popularity among hobbyists, educators, and professionals worldwide.
Raspberry Pi stands out as an ideal choice for IoT projects due to its exceptional ability to interface with a wide array of sensors and actuators. Its open-source architecture and extensive community support further enhance its appeal, making it a preferred platform for developing customized solutions tailored to specific needs.
Read also:What Does Obsidian Kingdom Mean Unveiling The Mysteries Of The Name
Key features of Raspberry Pi include:
- A compact design with minimal power consumption, ensuring portability and efficiency.
- Multiple GPIO pins facilitating seamless sensor integration, enabling interaction with external devices.
- Compatibility with various operating systems and programming languages, offering flexibility in development.
- Extensive documentation and a supportive community, providing invaluable resources for troubleshooting and innovation.
Raspberry Pi's affordability and adaptability have cemented its position as a go-to choice for remote IoT monitoring projects, empowering users to create cutting-edge solutions without incurring excessive costs.
Configuring Your Raspberry Pi for IoT Monitoring
Hardware Requirements
Before initiating the setup process, ensure you possess the following essential hardware components:
- Raspberry Pi (any model equipped with adequate GPIO pins).
- A MicroSD card with a minimum capacity of 16GB.
- A power supply compatible with your chosen Raspberry Pi model.
- Sensors (such as temperature, humidity, motion detectors, etc.) to collect data.
- A breadboard and jumper wires for organizing sensor connections effectively.
- A Wi-Fi dongle (if your Raspberry Pi model lacks built-in Wi-Fi capabilities).
Securing the appropriate hardware is crucial for a successful IoT monitoring project. Ensure all components are compatible with your Raspberry Pi model to prevent potential issues and guarantee optimal performance.
Software Setup
With the necessary hardware in place, it's time to configure the software. Begin by downloading the Raspberry Pi OS from the official website and installing it onto your MicroSD card using tools like Balena Etcher.
Once the operating system is set up, connect your Raspberry Pi to a monitor, keyboard, and mouse, and power it on. Proceed with the following steps to finalize the initial setup:
- Update the system by executing "sudo apt update" and "sudo apt upgrade" commands in the terminal.
- Enable SSH for remote access by running "sudo raspi-config" and navigating to the "Interfacing Options" menu.
- Set up Wi-Fi connectivity by modifying the "wpa_supplicant.conf" file or utilizing the graphical user interface (GUI).
With the software configuration complete, your Raspberry Pi is now primed for IoT monitoring projects, ready to bring your innovative ideas to life.
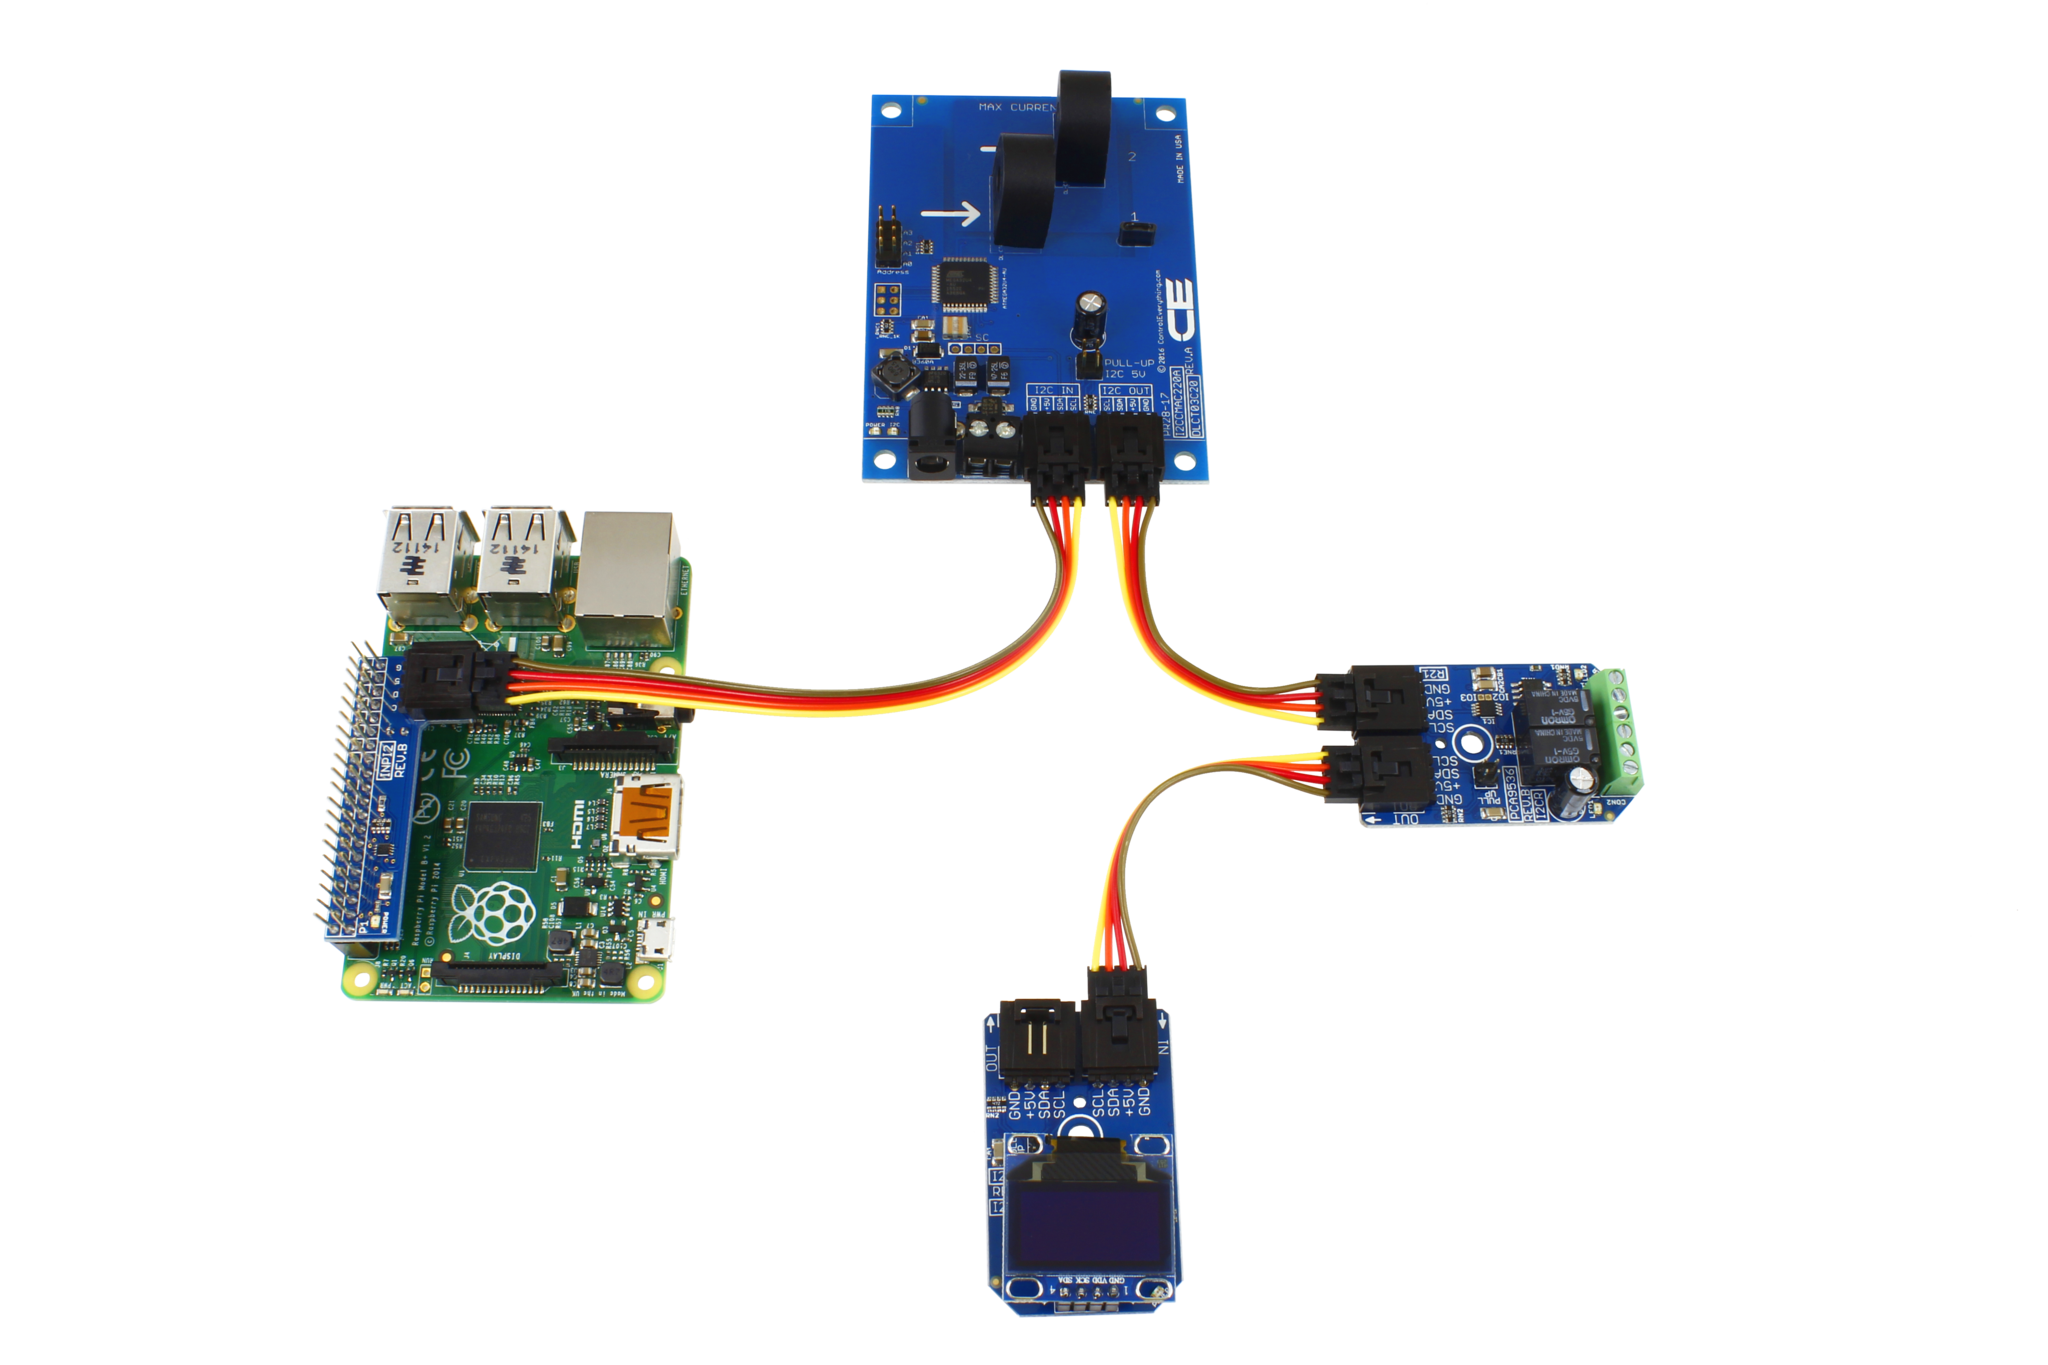
Integrating Sensors with Raspberry Pi
Connecting sensors to Raspberry Pi is a critical step in establishing a robust remote IoT monitoring system. Follow these recommendations to ensure effective sensor integration.
Selecting Appropriate Sensors
Choose sensors that align with your project objectives. Some widely used options include:
- Temperature and humidity sensors (such as DHT11, DHT22) for environmental monitoring.
- Light sensors (such as LDR, BH1750) for detecting illumination levels.
- Motion sensors (such as PIR) for detecting movement in specific areas.
- Gas sensors (such as MQ-2, MQ-135) for identifying harmful gases or monitoring air quality.
Ensure the chosen sensors are compatible with your Raspberry Pi model and have accessible libraries for streamlined integration, simplifying the development process.
Connecting Sensors to GPIO Pins
Adhere to the manufacturer's guidelines to connect your sensors to the appropriate GPIO pins on your Raspberry Pi. Utilize a breadboard and jumper wires to create a tidy and well-organized setup.
For instance, to connect a DHT22 temperature and humidity sensor:
- Link the VCC pin to a 3.3V or 5V pin on the Raspberry Pi.
- Connect the GND pin to a ground pin on the Raspberry Pi.
- Attach the data pin to a GPIO pin (such as GPIO4).
Verify all connections meticulously to prevent damage to your Raspberry Pi or sensors, ensuring a safe and reliable setup.
Programming Raspberry Pi for IoT Monitoring
Programming your Raspberry Pi to gather and process sensor data is the next crucial step in developing a remote IoT monitoring system. Follow these guidelines to initiate the process:
Selecting an Appropriate Programming Language
Choose a programming language based on your proficiency and project requirements. Some popular options for Raspberry Pi include:
- Python, known for its simplicity and extensive library support, making it an ideal choice for beginners.
- C++, offering high performance and resource efficiency for more demanding applications.
- JavaScript, perfect for web-based applications requiring dynamic interactions.
For those new to programming, Python is highly recommended due to its user-friendly nature and robust community support, facilitating a smoother learning curve.
Writing the Code
Leverage suitable libraries and frameworks to simplify the coding process. For example, to retrieve data from a DHT22 sensor using Python:
- Install the Adafruit DHT library by executing "sudo pip3 install Adafruit_DHT" in the terminal.
- Create a Python script to initialize the sensor and collect data at regular intervals.
- Store the collected data in a file or database for subsequent analysis and visualization.
Consult the official Raspberry Pi documentation and community forums for additional examples and tutorials, enhancing your understanding and skills.
Enabling Remote Access and Data Visualization
After your Raspberry Pi begins collecting sensor data, the subsequent step is to enable remote access and implement data visualization. Follow these recommendations to enhance your IoT monitoring system:
Setting Up Remote Access
Enable remote access to your Raspberry Pi using SSH or a remote desktop application, allowing you to monitor and control your system from any location globally.
For instance, to connect via SSH:
- Install an SSH client (such as PuTTY for Windows).
- Input your Raspberry Pi's IP address and login credentials to establish a connection.
- Access the terminal and execute commands remotely, maintaining full control over your system.
Incorporating Data Visualization
Utilize web-based tools or libraries to create interactive dashboards for visualizing your sensor data. Some popular options include:
- Grafana, an open-source data visualization platform offering powerful features for monitoring and analysis.
- Plotly, a Python library enabling the creation of interactive plots and charts for enhanced data representation.
- ThingSpeak, a cloud-based IoT platform equipped with built-in visualization tools for seamless data presentation.
Integrating data visualization into your IoT monitoring system provides valuable insights, fostering better decision-making and increasing user engagement.
Security Measures for Remote IoT Monitoring
Security is a fundamental aspect of any IoT project, particularly when involving remote monitoring. Follow these best practices to safeguard your system:
- Implement strong passwords and enable two-factor authentication for SSH access to enhance security.
- Regularly update your Raspberry Pi's operating system and installed packages to address security vulnerabilities promptly.
- Restrict network access to trusted devices and IP addresses, minimizing the risk of unauthorized access.
- Encrypt sensitive data transmissions using secure protocols such as HTTPS or TLS to protect information integrity.
By adopting these security measures, you can ensure the safety and reliability of your remote IoT monitoring system, maintaining trust and confidence in your operations.
Advanced Features and Customizations
Once you've established a functional remote IoT monitoring system, consider incorporating advanced features and customizations to elevate its capabilities:
Machine Learning Integration
Integrate machine learning algorithms to analyze sensor data and forecast future trends. For example, utilize TensorFlow or scikit-learn to develop predictive models for temperature or humidity levels, enhancing your system's analytical prowess.
Automated Alerts and Notifications
Set up automated alerts and notifications to stay informed about critical events. Employ tools like email, SMS, or push notifications to receive updates in real-time, ensuring prompt responses to important developments.
Scalability and Expandability
Design your system with scalability and expandability in mind, allowing for the addition of more sensors or devices as your project evolves. This forward-thinking approach ensures long-term success and adaptability to changing requirements.
Practical Applications of Remote IoT Monitoring with Raspberry Pi
Remote IoT monitoring with Raspberry Pi finds practical applications across various industries, demonstrating its versatility and potential. Some notable examples include:
- Home automation systems for optimizing energy consumption and enhancing security.
- Agricultural monitoring for assessing crop health and environmental conditions, promoting sustainable farming practices.
- Industrial automation for monitoring machine performance and facilitating predictive maintenance, reducing downtime and costs.
- Healthcare monitoring for tracking patient vitals and equipment status, ensuring timely interventions and improved patient care.
These applications highlight the diverse and impactful uses of remote IoT monitoring with Raspberry Pi, establishing it as an indispensable tool for innovation and problem-solving in today's interconnected world.
Conclusion and Future Steps
In summary, remote IoT monitoring with Raspberry Pi presents limitless possibilities for businesses and individuals striving to enhance their operations and refine decision-making processes. By adhering to the guidelines and best practices outlined in this guide, you can construct a robust and secure monitoring system tailored to your unique needs.
We encourage you to take the next step by experimenting with different sensors, programming languages, and visualization tools to broaden your knowledge and refine your skills. Sharing your experiences and projects with the Raspberry Pi community fosters collaboration and learning, inspiring others and enriching the collective expertise.
Thank you for engaging with this comprehensive guide on remote IoT monitoring with Raspberry Pi. We hope you found it insightful and valuable. Please leave a comment below or share this article with your network to support our mission of promoting innovation and learning in technology.
Table of Contents

